


Starting your WordPress website can feel overwhelming, especially if you’re not technically inclined.
But here’s the good news: with the right guidance, setting up your WordPress hosting is a straightforward process, even for complete beginners.
This WordPress hosting setup guide will walk you through everything you need, from choosing a host and registering a domain to installing WordPress and launching your website confidently.
Whether you’re starting a blog, building a portfolio, or launching a business site, this step-by-step tutorial is all you need to get online.
Understanding the Basics: Domain Name and Web Hosting And Why They Matter
Before you begin setting up your WordPress site, you must understand two key building blocks: domain name and web hosting.
These two elements work hand in hand to bring your website to life and make it accessible to the world.
What is a Domain Name?
A domain name is the unique web address people type into their browsers to visit your website, for example, www.yourwebsite.com.
Think of it as your online street address. It tells visitors where your website “lives” on the internet.
Why It Matters:
It’s your website’s first impression; a professional, memorable domain can help build trust.
A good domain reinforces your brand identity.
It makes your website easy to find and share.
Without a domain name, users would have to type in long strings of numbers (IP addresses) to find your site, which is neither user-friendly nor practical.
What is Web Hosting?
Web hosting is the service that stores all the files, images, databases, and code that make up your website.
When someone visits your domain, your web host delivers your content to their browser.
Think of web hosting as the land on which your website (your digital home) is built. Without it, your domain name has nowhere to point to.
Why It Matters:
It affects your site’s speed, uptime, and security.
A reliable host ensures your site is always accessible to visitors.
Hosting plays a key role in SEO and user experience; slow or unstable hosting can hurt your rankings and drive visitors away.
Simply put: no hosting = no website.
Why You Need Both, Together
To launch a WordPress website, you need:
- A domain name (your online address)
- A web hosting service (the server where your website lives)
When combined, they allow users to type their domain name and instantly access the content hosted on your server.
Most modern hosting providers simplify this process by offering domain registration and WordPress hosting as part of a single package.
This way, you can manage everything in one place, saving you time, money, and potential technical headaches.
Steps for setting up WordPress hosting
Step 1: Define Your Website Goals
Before jumping into hosting options, it’s essential to define your website’s purpose.
This foundational step will not only help you choose the right type of hosting but also ensure that your entire setup supports your long-term vision.
Ask Yourself the Right Questions:
- What kind of website are you building?
- A personal blog or journal?
- A small business website to promote services?
- An online portfolio to showcase your work?
- An e-commerce store to sell products?
- A membership site or learning platform?
- A personal blog or journal?
Each of these requires different levels of storage, performance, and functionality.
For example, an e-commerce store may need robust security and speed features, while a blog can get by with basic shared hosting.
- What type of content will you publish?
- Mostly text and images (low resource usage)?
- High-resolution photos or video content (requires more bandwidth and storage)?
- Will users be uploading files or interacting with the site often?
- Mostly text and images (low resource usage)?
This determines the hosting resources you’ll need, such as disk space, bandwidth, and memory.
- How much traffic are you expecting — now and later?
- Starting small, or planning a marketing campaign soon?
- Will you rely heavily on SEO, social media, or ads to drive traffic?
- Starting small, or planning a marketing campaign soon?
Planning for future growth ensures that your hosting can scale without causing downtime or speed issues later on.
- What’s your technical skill level and available time?
- Are you comfortable managing updates and settings yourself?
- Would you prefer a hands-off experience with automatic maintenance?
- Are you comfortable managing updates and settings yourself?
Your answer will guide whether you should go for managed WordPress hosting (less technical involvement) or unmanaged/shared hosting (requires more DIY setup).
- What is your budget?
Hosting prices range from a few dollars a month to premium plans costing hundreds. Knowing your budget helps narrow your options and avoid surprise renewal rates.
Why This Step Matters:
Defining your goals early prevents costly mistakes. It ensures that your website has the right foundation — one that supports your content, audience, and growth without overspending or underdelivering.
Step 2: Choose the Right WordPress Hosting Provider
This is one of the most important decisions you’ll make. Your hosting provider is the engine behind your website’s performance, security, and reliability.
A solid host means fewer technical headaches, faster load times, and better protection against threats, especially critical for beginners.
Key Features to Look For (Especially as a Beginner)
✅ WordPress Compatibility & One-Click Installation
Look for hosts that offer WordPress-specific plans or one-click installation tools. These make setting up WordPress simple, with no coding or manual uploads required.
✅ Reliability and Uptime Guarantees
Choose providers that offer at least 99.9% uptime. Anything less can result in frequent site outages, lost traffic, and frustrated visitors.
✅ Speed and Performance Enhancements
Site speed affects user experience and SEO rankings. Look for features like:
SSD storage (faster than traditional HDDs)
Built-in caching
Content Delivery Network (CDN) integration
Server-side optimization for WordPress
✅ Robust Security Measures
A beginner-friendly host should include:
Free SSL certificate (enables HTTPS encryption)
Daily malware scans
Automatic updates
Firewalls and DDoS protection
✅ 24/7 Customer Support
Beginners often need help. Choose a host that offers round-the-clock support via:
Live chat
Email/ticket system
Phone support
Bonus if they offer a knowledge base or video tutorials.
✅ Scalability Options
As your website grows, your hosting needs will too. Look for providers that let you upgrade your plan seamlessly, whether to handle more traffic or unlock advanced features.
✅ Automatic Backups
Mistakes happen. Regular automated backups ensure that you can restore your site easily if something goes wrong.
✅ Transparent Pricing
Many hosts advertise low initial prices that spike upon renewal. Compare the introductory rate vs the renewal rate, and see what’s included (domain, SSL, support, etc.).
Types of WordPress Hosting Explained
Here’s a breakdown of the most common hosting options, made for beginners:
🔹 1. Shared Hosting (Beginner-Friendly & Budget-Friendly)
Your site shares server resources with multiple other websites.
Cost: Cheapest option ($2–$5/month)
Pros: Easy to set up, ideal for small sites
Cons: Limited resources, can slow down if neighboring sites are busy
✅ Best For: Personal blogs, simple business sites, first-time creators
🔹 2. Managed WordPress Hosting (Hassle-Free and Optimized)
The host handles technical WordPress tasks like updates, backups, caching, and security.
Cost: Moderate to high ($15–$30+/month)
Pros: Great speed and security, beginner support, hands-off
Cons: More expensive than shared hosting
✅ Best For: Users who want premium support and minimal maintenance
🔹 3. VPS Hosting (Scalable and More Control)
You get dedicated portions of a server (virtual environment).
Cost: Mid-range to high ($20–$80+/month)
Pros: Faster, more reliable than shared, and scalable
Cons: Requires some technical knowledge
✅ Best For: Sites expecting moderate traffic or needing custom setups
🔹 4. Dedicated Hosting (High-Powered & Advanced)
You rent an entire server for your website alone.
Cost: High ($100+/month)
Pros: Full control, maximum speed, and resources
Cons: Overkill for beginners, requires tech expertise
✅ Best For: Enterprise-level websites with massive traffic
Which Should You Choose as a Beginner?
For most first-time website owners, there are two ideal choices:
Shared Hosting – Great if you’re on a tight budget and want to learn the ropes.
Managed WordPress Hosting – Worth the extra cost if you want convenience, speed, and strong support.
Step 3: Register Your Domain Name
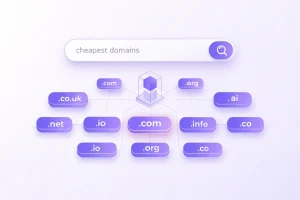
Once you’ve chosen a hosting provider, you’ll need to register your domain name.
Check Availability: Most hosting providers have a domain search tool on their website where you can check if your desired domain name is available.
Keep it Simple: Choose a domain name that is short, memorable, easy to spell, and relevant to your website’s purpose.
Choose the Right Extension: While .com is generally preferred, other extensions like .net, .org, or country-specific ones (.co.ke for Kenya) can also work.
Register: Follow the prompts to register your domain. You’ll typically pay for it annually. Many hosting providers offer a free domain name for the first year with a hosting plan purchase.
If you register your domain with a separate registrar, you’ll need to update its nameservers to point to your hosting provider.
Your hosting provider will give you the necessary nameserver information, and they often have guides on how to do this.
Step 4: Install WordPress
This is where your website truly begins to take shape! Most hosting providers offer extremely user-friendly ways to install WordPress.
Using a One-Click Installer (Recommended for Beginners):
The vast majority of web hosts provide a “one-click” WordPress installer (often powered by Softaculous or similar tools) within their control panel (like cPanel or their custom dashboard).
- Log in to your hosting control panel: Your host will provide you with login details via email after you sign up.
- Locate the WordPress installer: Look for an icon or link labeled “WordPress,” “Auto Installer,” “Softaculous Apps Installer,” or “WordPress Manager.”
- Initiate the installation: Click on the WordPress icon.
- Fill in the details:
- Choose Installation URL: Select the domain you registered (e.g., https://yourwebsite.com). Make sure to use https:// for security.
- Site Name/Site Title: Enter the name of your website (you can change this later).
- Admin Username: Choose a unique and secure username (avoid “admin”).
- Admin Password: Create a strong password (a mix of uppercase, lowercase, numbers, and symbols). Store this securely!
- Admin Email: Enter an active email address for important notifications and password recovery.
- Click “Install”: The installer will automatically download and set up WordPress on your hosting account. This usually takes just a few minutes.
Manual Installation (Less Common for Beginners):
While less common for beginners due to the availability of one-click installers, manual installation involves:
- Downloading the WordPress software from WordPress.org.
- Creating a MySQL database on your hosting account.
- Uploading the WordPress files to your server using an FTP client (like FileZilla).
- Run the WordPress installation script through your web browser.
For beginners, stick with the one-click installer!
Step 5: Access Your WordPress Dashboard
Once WordPress is installed, you can access your website’s administrative area, known as the WordPress dashboard or admin panel.
To access your dashboard: Open your web browser and type yourdomain.com/wp-admin (replace yourdomain.com with your actual domain name).
Login: Enter the admin username and password you created during the installation process.

Congratulations! You’re now inside your WordPress dashboard, the central hub for managing your entire website.
Step 6: Initial WordPress Configuration (Important First Steps)
Before you start building pages, make a few essential configurations:
- General Settings:

- Go to Settings > General.
- Review your Site Title and Tagline (a short description of your site).
- Ensure your WordPress Address (URL) and Site Address (URL) are correct (they should usually be the same and include https://).
- Set your Timezone, Date Format, and Time Format.
- Click “Save Changes.”
- Permalinks:

- Go to Settings > Permalinks.
- Choose a user-friendly permalink structure. The “Post name” option (yourdomain.com/sample-post/) is highly recommended for SEO and readability.
- Click “Save Changes.”
- Delete Default Content:

- Go to Posts > All Posts and delete the “Hello world!” post.
- Go to Pages > All Pages and delete the “Sample Page” and “Privacy Policy” (you’ll create your own later).
- Go to Comments > All Comments and delete the default comment.
Step 7: Choose and Install a WordPress Theme
Your theme dictates the visual appearance and layout of your website.
- Browse Themes:
- From your dashboard, go to Appearance > Themes.
- Click “Add New” to explore thousands of free themes in the official WordPress.org theme directory.
- You can filter by popular, latest, feature filter, or search by keyword.
- Consider Theme Features:
- Responsiveness: Ensure the theme looks good on all devices (desktops, tablets, phones). Most modern themes are responsive by default.
- Loading Speed: A lightweight theme contributes to faster loading times.
- SEO Friendliness: Themes designed with good coding practices often perform better in search engines.
- Reviews and Updates: Check user reviews and ensure the theme is regularly updated by its developers.
- Purpose: Choose a theme that aligns with your website’s goals (e.g., a blog theme for a blog, a business theme for a corporate site).
- Install and Activate:
- Once you find a theme you like, hover over it and click “Install.”
- After installation, click “Activate” to apply it to your site.
- You can preview themes before activating them.
- If you purchased a premium theme, you’ll typically upload it as a .zip file via the “Upload Theme” option.
Step 8: Install Essential Plugins
Plugins extend the functionality of your WordPress website without needing to write code. While there are thousands of plugins, here are some essential categories for beginners:
- Security: Wordfence Security, Sucuri Security (to protect against malware, hacks, etc.)
- SEO (Search Engine Optimization): Yoast SEO, Rank Math (to help your website rank higher in search results)

- Performance/Caching: WP Super Cache, LiteSpeed Cache, WP Fastest Cache (to speed up your website)
- Backup: UpdraftPlus, BackWPup (for easy backups and restoration)
- Contact Forms: Contact Form 7, WPForms (to create contact forms for your visitors)
- Page Builder (Optional but Recommended): Elementor, Beaver Builder, SeedProd (drag-and-drop tools for easier page design)
How to Install Plugins:
- From your dashboard, go to Plugins > Add New.
- Search for the plugin you want.
- Click “Install Now” next to the plugin.
- After installation, click “Activate.”
- Many plugins will then have their own settings area under Settings or their dedicated menu item in the left sidebar.
Important Note: Don’t install too many plugins, as they can slow down your site. Only install what you genuinely need.
Step 9: Create Essential Pages and Content
Now that the foundation is laid, start building your website’s content:
Home Page: Your website’s main landing page.
About Us Page: Tell your story, mission, and what your website is about.
Contact Page: Provide ways for visitors to reach you (contact form, email, phone).
Privacy Policy Page: Important for legal compliance, especially if you collect user data.
Blog Page (if applicable): Where your blog posts will appear.
How to Create Pages:
- Go to Pages > Add New.
- Enter a title for your page.
- Use the WordPress block editor (Gutenberg) to add text, images, videos, and other content.
- Click “Publish” when you’re ready for the page to go live.
How to Create Posts (for blogs):
- Go to Posts > Add New.
- Enter a title and your blog post content.
- Assign categories and tags to organize your posts.
- Set a featured image.
- Click “Publish.”
Step 10: Set Up Your Navigation Menu
Help visitors navigate your site by creating a clear menu.
- Go to Appearance > Menus.
- Click “Create a new menu.”
- Give your menu a name (e.g., “Main Menu”).
- Select the pages and posts you want to include in your menu from the left-hand column and click “Add to Menu.”
- Drag and drop menu items to rearrange them or create sub-menus.
- Assign your menu to a “Display location” (e.g., “Primary Menu,” “Header Menu” – these options depend on your theme).
- Click “Save Menu.”
Step 11: Optimize for Performance and Security
Image Optimization: Large images can significantly slow down your site. Use plugins like Smush or EWWW Image Optimizer to compress images without losing quality.
Caching: Caching plugins (like those mentioned in Step 8) create static versions of your pages, which load much faster for returning visitors.
SSL Certificate: Ensure your site uses https://. Most hosts provide a free SSL certificate. If not, install one. This encrypts data between your site and visitors, and it’s crucial for SEO.
Regular Updates: Always keep your WordPress core, themes, and plugins updated to the latest versions to patch security vulnerabilities and ensure compatibility.
Strong Passwords: Use strong, unique passwords for your WordPress admin and hosting accounts.
Step 12: Launch Your Website!
If you’ve followed these steps, your WordPress website is essentially live and accessible to the world.
Review Everything: Before actively promoting your site, take some time to review all your pages, links, and content to ensure everything is working as expected.
Remove “Coming Soon” Page (if used): If you used a “coming soon” plugin during development, remember to disable it.
Announce Your Launch: Share your new website with your audience!
Conclusion
Setting up WordPress hosting might seem daunting at first, but by breaking it down into these manageable steps, even beginners can successfully launch their website.
Remember, the WordPress community is vast and supportive, with countless resources available online if you encounter any challenges.
With a reliable host and a little dedication, you’ll be well on your way to building a powerful and engaging online presence.